Website Security Fundamentals: A Practical Guide to Keeping Your Site Safe
A website doesn’t have to be large to become a target. Even small, newly launched sites get probed constantly—often by automated bots looking for easy entry points. The good news is that basic security isn’t complicated. With a few deliberate steps, you can protect your site, your data, and your visitors without needing a deep technical background.
This guide walks through the fundamentals in plain language, with practical actions you can apply immediately.
Start With the Foundation: Domain vs Hosting
Before getting into security, it helps to understand the two pieces you’re working with:
- Domain name: your website’s address (like yourbusiness.com)
- Web hosting: the server where your website files live
Think of your domain as the sign outside a shop, and hosting as the building itself. Security applies to both—if either is compromised, your site can be affected.
How to Connect a Domain to Hosting (Safely)
A surprising number of security issues start during setup. If your domain isn’t connected properly, you might expose your site to misconfigurations or downtime.
Here’s the clean, correct way to handle it.
Step 1: Get Your Hosting Nameservers
Your hosting provider will give you nameservers, usually formatted like:
- ns1.yourhost.com
- ns2.yourhost.com
These tell the internet where your website is located.
Step 2: Update Domain DNS Settings
Log into your domain registrar (such as GoDaddy or Namecheap) and find your domain’s DNS or nameserver settings.
Replace the default nameservers with the ones from your hosting provider.
Step 3: Save and Wait
Once saved, the connection begins. This is where many beginners panic because the change isn’t instant.
Step 4: Allow DNS Propagation
Changes take time to spread across global servers. This process is called DNS propagation, and it can take anywhere from a few minutes to 48 hours.
During this time:
- Your site may load in some locations but not others
- You might see an old version or an error page
This is normal. Avoid making repeated changes—it only resets the process.
Understanding DNS Basics (Without the Jargon)
You don’t need to master DNS, but knowing a few terms helps prevent mistakes.
Nameservers
These control your domain’s DNS. When you update them, you’re essentially handing control over to your hosting provider.
DNS Records
If you don’t use nameservers, you can connect manually using records:
- A record: links your domain to a server IP
- CNAME: points one domain to another
DNS Propagation
This is the delay between updating DNS and seeing the result worldwide. It exists because the internet relies on cached data for speed.
The Core Layers of Website Security
Website security isn’t one setting—it’s a combination of protections working together.
1. Strong Access Control
Weak passwords are still one of the most common causes of hacks.
What to do:
- Use long, unique passwords (not reused elsewhere)
- Enable two-factor authentication (2FA) where possible
- Avoid default usernames like “admin”
If you’re using a CMS like WordPress, this step alone dramatically reduces risk.
2. Keep Everything Updated
Outdated software is one of the easiest ways in.
Update regularly:
- Your CMS
- Themes and plugins
- Server-side software (handled by your host in many cases)
If you delay updates, you’re effectively leaving known vulnerabilities open.
3. Use HTTPS (SSL Certificate)
An SSL certificate encrypts data between your site and visitors. Without it, information can be intercepted.
Most hosting providers offer free SSL via services like Let’s Encrypt.
Once installed:
- Your site uses https:// instead of http://
- Browsers show a secure lock icon
It’s not optional anymore—modern browsers warn users about non-secure sites.
4. Choose Reliable Hosting
Not all hosting environments are equal. Cheap or poorly managed hosting often cuts corners on security.
Look for hosting that includes:
- Firewall protection
- Malware scanning
- Automatic backups
- Isolation between accounts
Security at the server level protects you before problems even reach your website.
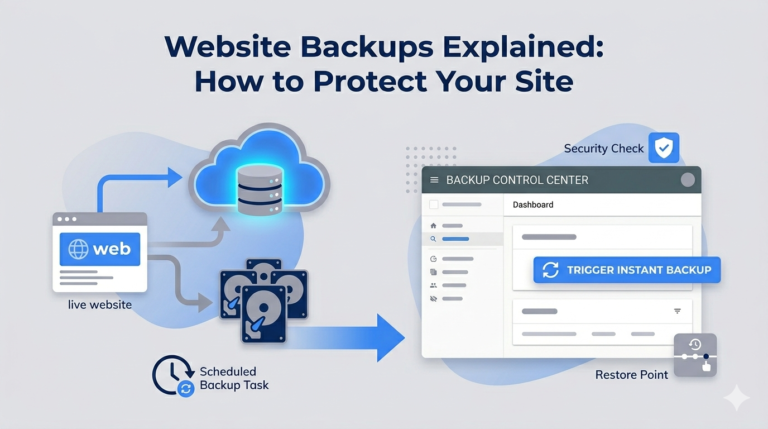
5. Regular Backups
Even with strong protection, things can go wrong. Backups are your safety net.
Best practices:
- Keep daily or weekly backups
- Store backups off-site (not just on the same server)
- Test restoring them at least once
If your site is compromised, a clean backup can save hours—or days—of recovery work.
Common Mistakes That Leave Sites Vulnerable
Many security issues aren’t sophisticated—they’re simple oversights.
Ignoring DNS Misconfigurations
Incorrect DNS settings can expose your site or break SSL. Double-check:
- Nameservers are correct
- Old records aren’t conflicting
Installing Too Many Plugins
Every plugin adds potential risk. Poorly maintained plugins can introduce vulnerabilities.
Stick to:
- Trusted developers
- Active updates
- Only what you actually need
Not Removing Unused Accounts
Old user accounts—especially with admin access—are easy targets.
Clean up:
- Inactive users
- Temporary logins
- Accounts from past collaborators
Using Public Wi-Fi Without Protection
Accessing your site admin from unsecured networks increases risk. If you must:
- Use a VPN
- Avoid logging into sensitive areas
Basic Security Tools Worth Using
You don’t need dozens of tools. A few well-chosen ones are enough.
Firewall
A web application firewall (WAF) blocks malicious traffic before it reaches your site.
Security Plugins
If you’re using WordPress, plugins can help with:
- Login protection
- Malware scanning
- File integrity checks
Monitoring Alerts
Set up alerts for:
- Failed login attempts
- File changes
- Downtime
Early warnings give you time to respond before issues escalate.
Troubleshooting: When Something Feels Off
Sometimes your site behaves strangely, and it’s not clear why.
Here’s how to approach it calmly.
Site Not Loading After Setup
Check:
- Nameservers are correct
- DNS propagation isn’t still in progress
- Hosting account is active
SSL Not Working
Make sure:
- DNS has fully propagated
- SSL is installed for the correct domain
- Redirects are configured properly
Suspicious Activity
Signs include:
- Unexpected redirects
- Unknown files or users
- Sudden traffic spikes
In that case:
- Change all passwords immediately
- Restore from a clean backup
- Contact your hosting support
A Practical Mindset That Keeps You Safe
Security isn’t about paranoia—it’s about consistency.
A few habits make a big difference:
- Make changes carefully, especially with DNS
- Avoid rushing through setup steps
- Don’t ignore small warnings or errors
- Keep a simple checklist for updates and backups
Most successful attacks don’t involve advanced techniques. They rely on gaps—things left undone or overlooked.
Final Thoughts
Website security isn’t a one-time task. It’s a set of small, repeatable actions that protect your site over time.
Start with the basics: connect your domain to hosting correctly, understand how DNS works, secure access points, and keep your system updated. From there, add layers gradually.
You don’t need to lock everything down perfectly on day one. You just need to close the obvious doors—and keep them closed.